Fix My Speaker Sound App
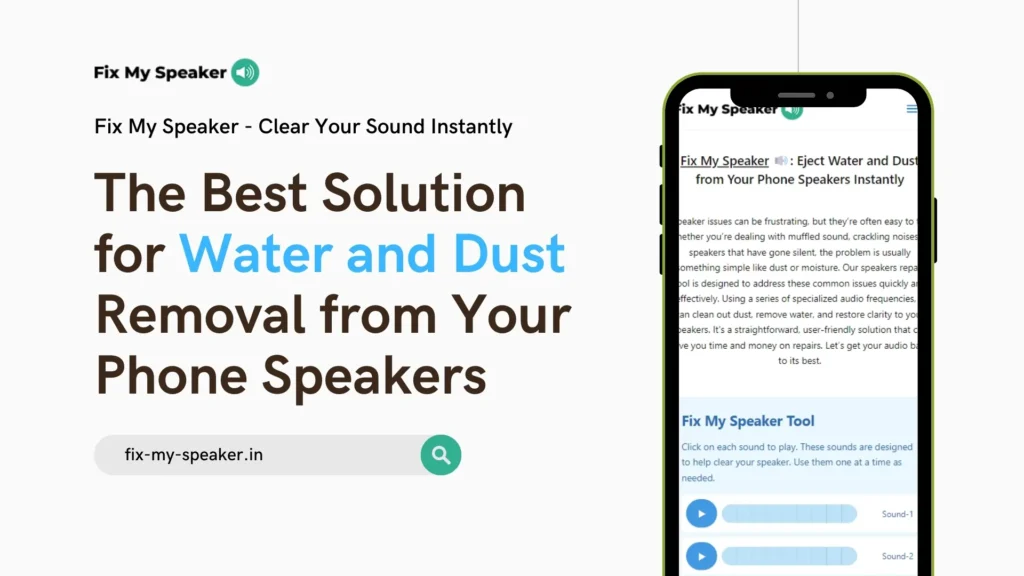
Fix My Speaker Tool
Click on each sound to play. These sounds are designed to help clear your speaker. Use them one at a time as needed.
Speaker issues can be frustrating, but they’re often easy to fix. Whether you’re dealing with muffled sound, crackling noises, or speakers that have gone silent, the problem is usually something simple like dust or moisture. Our speakers repair App is designed to address these common issues quickly and effectively. Using a series of specialized audio frequencies, it can clean out dust, remove water, and restore clarity to your speakers. It’s a straightforward, user-friendly solution that can save you time and money on repairs. Let’s get your audio back to its best.
- Fix My Speaker Sound App
- Fix My Speaker Tool
- How to Use Fix My Speaker Tool: A Simple Step-by-Step Guide
- Diagnosing Speaker Issues: From Common Problems to Precise Audio Tests
- Why Fix My Speaker's 8-Sound Cleaner App Outperforms Standard Speaker Repair Tools
- Why Cleaning Your Phone Speakers is Important
- How to Clean Your Phone Speaker with Sound
- Why Is My Phone Speaker Making a Crackling Sound?
- How to Fix Speaker Crackling Sound on Phones
- How to Fix Speaker Crackling Sound on Laptops
- Tips for Maintaining Clean Phone Speakers From Dust and Water
- The Benefits of High Frequency Sounds To Clean Your Speaker
- How to Clean a Water Damaged Phone Speaker
- User Reviews: Fix My Speaker's Effectiveness in Ejecting Water and Dust
- People Also Ask
- How does Fix My Speaker remove water and dust from phone speakers?
- Is Fix My Speaker safe to use on my phone?
- How often should I use Fix My Speaker to clean my phone's speakers?
- Can Fix My Speaker completely repair water-damaged phone speakers?
- Is Fix My Speaker free to use, and do I need to download an app?
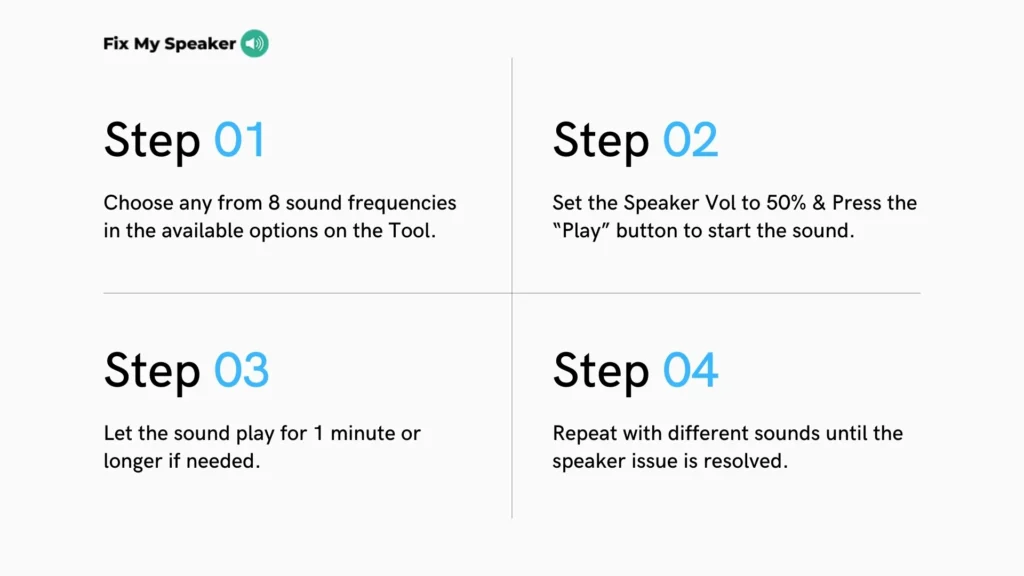
How to Use Fix My Speaker Tool: A Simple Step-by-Step Guide
Here’s how to use our speaker repair tool effectively:
- Prepare your environment: Choose a quiet room to minimize background noise. Set your device volume to 50% for optimal results. Ensure your speaker is properly connected and powered on. If possible, place the speaker on a flat, stable surface.
- Choose your repair sound: Look at our list of 8 specialized repair sounds. Select the one that best matches your speaker issue. If unsure, start with the any sound.
- Apply the repair sound: Click the “Play” button next to your chosen sound. Let the sound play for the full duration (usually 30-60 seconds). Keep the speaker volume at 50% during this process. Avoid touching or moving the speaker while the sound plays.
- Test your speaker: After the repair sound finishes, play some music you’re familiar with. Listen carefully for any improvements or changes in sound quality. If the issue persists, you can try the repair sound again (up to 3 times). If one sound doesn’t work, you can try a different repair sound.
- Repeat if necessary: Some issues may require multiple applications. Wait about 5 minutes between each attempt. If you don’t notice any improvement after 3 tries, move on to a different repair sound.
- Final check: Once you’re satisfied with the results, test your speaker with various types of audio (music, speech, etc.). Check at different volume levels to ensure the problem is fully resolved.
Remember, while our tool can fix many common speaker issues, some problems may require professional repair. If you don’t see improvement after trying all relevant sounds, consider seeking expert help.
Why Our 8-Sound Speaker Repair App Can Fix your Speaker
Sound 1 (25-50 Hz): The “Rumble Restorer” focuses on the very low end of the audible spectrum. This can help revitalize a speaker’s ability to produce those deep, felt-more-than-heard frequencies. It’s great for subwoofers or full-range speakers that have lost their low-end impact.
Sound 2 (1-50Hz): This low-frequency sound, aptly named “Bass Booster,” is excellent for rejuvenating your speaker’s ability to produce deep, rich bass tones. It gently exercises the woofer, helping to restore flexibility to the cone and suspension. This can be particularly beneficial for speakers that have been inactive for a while or are struggling with low-end response.
Sound 3 (50-100Hz): The “Water Expeller” is your go-to solution for water-damaged speakers. This frequency range creates strong, slow vibrations that can help push out water droplets from the speaker components. It’s especially useful after accidental spills or exposure to rain, potentially saving your speaker from permanent water damage.
Sound 4 (165-50Hz): This unique descending tone, the “Membrane Massager,” works wonders for overall speaker health. It starts by exercising the smaller components and gradually moves to the larger ones, helping to maintain flexibility across all parts of the speaker. This can improve overall sound quality and extend your speaker’s lifespan.
Sound 5 (1-50Hz Saw): The “Dust Demolisher” uses a saw wave pattern, which is particularly effective at dislodging dust particles. The varying intensity of the saw wave creates a ‘shaking’ effect that can reach into small crevices, making it excellent for thorough speaker cleaning without any physical intervention.
Sound 6 (1-200Hz): This wide-ranging sound, the “Full Range Flex,” is like a full workout for your speaker. It exercises all components from the woofer to the mid-range, helping to maintain overall flexibility and responsiveness. This can be particularly beneficial for improving clarity across all frequencies.
Sound 7 (150-200Hz): Despite its relatively low frequency range, the “Treble Tuner” helps prepare your speaker for better high-frequency performance. It exercises the parts of the speaker responsible for connecting to the tweeter, potentially improving the clarity and crispness of higher tones.
Sound 8 (50-100Hz Saw): The “Crackle Crusher” uses a saw wave pattern in the low-mid range. This is particularly effective at addressing issues that cause crackling or popping sounds. The intense vibrations can help reseat loose connections or dislodge small particles causing interference.
| Sound Order | Frequency Range | Best For |
| Sound 1 | 1-50Hz | Improving low-end response |
| Sound 2 | 50-100Hz | Removing water from speakers |
| Sound 3 | 165-50Hz | Overall speaker health |
| Sound 4 | 1-50Hz Saw | Removing dust and small particles |
| Sound 5 | 1-200Hz | Improving overall clarity |
| Sound 6 | 150-200Hz | Enhancing high-frequency performance |
| Sound 7 | 50-100Hz Saw | Fixing crackling and popping sounds |
| Sound 8 | 25-50 Hz | Revitalizing very low frequency response |
Diagnosing Speaker Issues: From Common Problems to Precise Audio Tests
Speaker issues can disrupt your listening experience, whether you’re enjoying music, watching videos, or on a call. Identifying the problem is the first step towards a solution. Let’s explore how to recognize common speaker issues and use effective tests to pinpoint the exact problem.
Several issues can affect speaker performance. Here are the most frequent problems users encounter:
- Distorted or unclear sound: This often occurs when playing audio at high volumes or when the speaker components are damaged. You might hear a fuzzy or warped version of the audio, especially in songs with deep bass or high treble notes. This could indicate issues with the speaker cone, voice coil, or amplifier.
- No sound output: If your speaker isn’t producing any sound at all, it could be due to a disconnected wire, a faulty power source, or in severe cases, a completely blown speaker. Check your connections and power supply before assuming the speaker itself is damaged.
- Buzzing, humming, or static noise: These unwanted sounds often point to electrical issues or interference. They might be caused by ground loops in your audio system, nearby electronic devices, or damaged speaker components. The noise might be constant or occur only when audio is playing.
How to Conduct Audio Tests To Diagnose the issue
Once you’ve identified the general problem, specific audio tests can help determine the exact issue:
- Frequency response test: This test plays a sweep of frequencies from low to high which is offered by our Fix my Speaker Tool. It helps identify if your speaker is having trouble with specific frequency ranges. For example, if you can’t hear low tones, there might be an issue with the woofer. If high notes are missing, the tweeter might be the culprit.
- Channel balance test: For stereo setups, this test ensures both left and right speakers are working correctly and at the same volume level. It plays audio alternately through each channel, helping you identify if one speaker is underperforming compared to the other.
- Sine wave test: By playing pure tones at different frequencies, this test can reveal distortions or resonances in your speaker system. Listen for any buzzing or rattling sounds that shouldn’t be there, as these can indicate loose parts or damaged components.
Why Fix My Speaker’s 8-Sound Cleaner App Outperforms Standard Speaker Repair Tools
| Feature | Fix My Speaker Tool | Other Tools |
| Number of specialized sounds | ✓ 8 | ✗ 1-3 |
| Frequency range covered | ✓ 1-200Hz | ✗ Limited |
| Water damage repair | ✓ | ✗ |
| Dust removal | ✓ | ✗ |
| Crackling sound elimination | ✓ | ✓ |
| Low frequency restoration | ✓ | ✗ |
| High frequency enhancement | ✓ | ✓ |
| Overall speaker health | ✓ | ✗ |
| Scientifically backed | ✓ | ✗ |
| Easy to use | ✓ | ✓ |
| No physical intervention | ✓ | ✓ |
| Customizable for issues | ✓ | ✗ |
| Regular updates | ✓ | ✗ |
| Free Of Cost | ✓ | ✗ |
Why Cleaning Your Phone Speakers is Important
Cleaning your phone speakers is crucial for maintaining optimal sound quality. Over time, dust, dirt, and small particles can accumulate in the speaker grills, which can muffle the audio output, making it harder to hear calls, music, or notifications clearly. Regular cleaning helps remove these obstructions, allowing the sound to remain crisp and clear, which ensures that your phone continues to perform at its best without any noticeable audio degradation.
Neglecting dirty phone speakers can lead to more significant issues than just poor sound quality. The buildup of debris over time can cause permanent damage to the speaker components, potentially resulting in costly repairs or even the need for a complete speaker replacement. By taking the time to clean your phone’s speakers regularly, you can help extend the overall lifespan of your device and avoid unnecessary expenses.
Incorporating proper phone maintenance into your routine, which includes regularly cleaning the speakers, is essential for both device performance and hygiene. Considering how frequently we handle our phones, keeping the speakers free from dirt and germs is important not only for maintaining clear audio but also for reducing potential health risks. Regular cleaning ensures that your device stays in top condition, both functionally and hygienically.
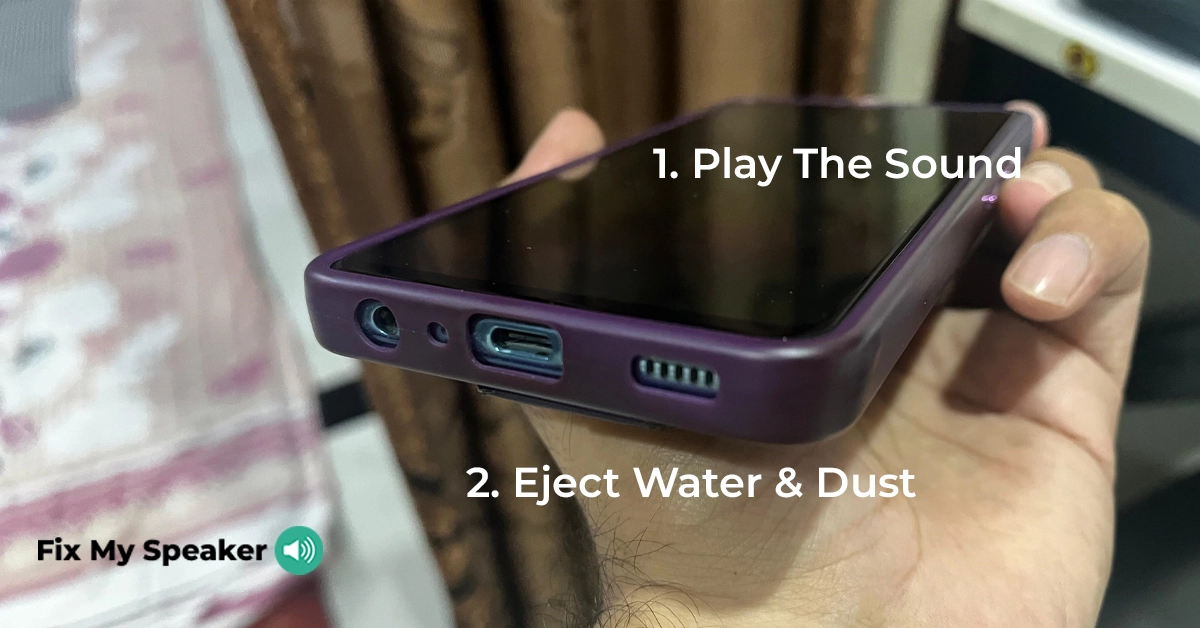
How to Clean Your Phone Speaker with Sound
Cleaning your phone speaker with sound is an innovative approach that leverages sound waves to dislodge dirt and debris trapped in the speaker grills. This method is possible because high-frequency sounds cause the speaker’s diaphragm to vibrate rapidly, which can help shake loose particles that may obstruct the audio output. It’s a simple yet effective technique that doesn’t require physical contact with your phone, reducing the risk of damaging delicate components.
Using sound to clean your phone speaker is possible and increasingly popular. Traditional methods like using a soft brush or compressed air can be effective. Still, they come with the risk of pushing debris further into the speaker or causing damage if done incorrectly. Sound-based cleaning is a non-invasive alternative that can be done quickly and safely, making it a preferred choice for many users who want to maintain their phone’s audio quality without the hassle.
To help users easily clean their phone speakers using sound, I have developed an 8 Sound Cleaner App on my website. This tool features a range of high-frequency sound waves specifically designed to vibrate the speaker’s diaphragm in a way that effectively clears out any accumulated dust or debris. Each of the eight sounds varies in frequency and intensity, allowing users to choose the one that works best for their particular device and level of blockage. The tool is simple to use—just play the sound through your phone’s speaker and let the vibrations do the work.
Its user-friendly interface and effectiveness set my 8 Sound Speaker Cleaner App apart. Whether dealing with minor dust buildup or more stubborn debris, this tool offers a convenient solution without needing special equipment. Users can access the tool directly from my website, play the sounds, and experience immediate improvements in their phone’s audio clarity. It’s an easy, risk-free way to maintain your phone’s performance and keep your speaker functioning at its best.
Why Is My Phone Speaker Making a Crackling Sound?
A crackling sound from your phone speaker can be annoying and usually means something isn’t suitable with your device. One common reason for this problem is dirt or dust in the speaker grills. These particles can block the speaker, causing the sound to crackle or buzz. Regularly cleaning your phone’s speakers can help fix this and bring back clear sound.
Another reason your speaker might crackle could be a software issue. Sometimes, old or faulty software can cause problems with sound, including crackling noises. Keeping your phone’s operating system and apps up to date can often solve this. If the issue doesn’t go away after updates, you might need to reset your phone but remember; this will erase all your data, so do it carefully.
If your phone has been dropped or exposed to water, it might have hardware damage, causing the crackling sound. Damage to the speaker components often needs professional repair or even speaker replacement. If you think your phone has hardware damage, it’s a good idea to get it checked by a technician to prevent the problem from worsening.
If the crackling is due to dirt, using my Fix My Speaker App might help. This tool, available on my website, uses particular sound waves to shake loose any debris in the speaker. By playing these sounds through your phone, you might be able to clear out the dirt and get your speaker working correctly again without needing to open the phone or take it to a repair shop.
How to Fix Speaker Crackling Sound on Phones
If your phone’s speaker is making a crackling sound, the first thing to do is check for dirt or dust in the speaker grills. Gently clean the speaker area with a soft brush or use compressed air to blow out any debris. This can help clear out anything blocking the sound and improve audio quality.
Next, check if your phone’s software is up to date. Outdated software can cause various issues, including crackling sounds from the speaker. Go to your phone’s settings, look for software updates, and install any available updates. If the problem persists, try restarting your phone or resetting your sound settings.
If cleaning and software updates don’t fix the issue, the crackling sound might be due to hardware damage. This can happen if the phone has been dropped or exposed to water. In this case, it’s best to take your phone to a professional technician who can diagnose the problem and recommend repair or replacement of the speaker.
How to Fix Speaker Crackling Sound on Laptops
For laptops, speaker crackling can also be caused by dust or debris. Start by cleaning the speaker area with a soft cloth or using compressed air to remove dirt. This can often help improve the sound quality by clearing the speakers of blockages.
Check your laptop’s audio drivers to ensure they are up to date. Outdated or corrupted drivers can cause audio issues like crackling. You can update your drivers by going to the device manager on your laptop, finding the sound, video, and game controllers section, and updating the drivers from there.
Sometimes, the crackling sound can be due to incorrect audio settings. Go to your laptop’s sound settings and check the output device, ensuring it’s set to the correct speakers. Adjusting the sound quality settings to a lower level might also reduce crackling.
If these steps don’t work, the issue might be related to hardware damage or a malfunctioning speaker. In this case, it’s advisable to contact a professional technician who can assess the problem and provide a solution, which might involve repairing or replacing the laptop’s speakers.
Tips for Maintaining Clean Phone Speakers From Dust and Water
Keeping your speakers in top condition doesn’t just improve sound quality—it also extends their lifespan. Here are some expert-approved tips to maintain your audio equipment:
- When possible, keep your phone away from liquids and humid environments to minimize the risk of water damage.
- Invest in a high-quality, water-resistant phone case to provide an extra layer of protection against accidental spills and dust accumulation.
- Gently wipe your phone’s exterior with a soft, lint-free cloth to remove any dirt or debris that may accumulate around the speaker grilles.
- When not in use, store your phone in a clean, dry place to prevent dust and moisture from entering the speakers.
- Use a soft, dry microfiber cloth to gently wipe speaker surfaces weekly, and for grilles, use a soft brush attachment on a vacuum cleaner, avoiding liquid cleaners which can damage internal components.
- Avoid playing audio at maximum volume for extended periods, give your speakers ‘rest’ time between long listening sessions, use a surge protector to safeguard against electrical damage, and break in new speakers gradually over 20-30 hours of normal use.
- Keep speakers away from direct sunlight and heat sources, maintain room temperature between 60-80°F (15-27°C), avoid extremely humid environments to prevent moisture damage, and place speakers on stable surfaces to minimize vibrations.
- Inspect cables and connections monthly for wear or looseness, listen for any changes in sound quality which may indicate issues, check for any physical damage or deformities in the speaker cones, and use our Fix My Speaker tool periodically as preventative maintenance.
The Benefits of High Frequency Sounds To Clean Your Speaker
Fix My Speaker offers numerous benefits for phone users looking to maintain the health and performance of their devices:
- Free and convenient: The web app is completely free to use and can be accessed from any device with a web browser, making it a convenient solution for on-the-go cleaning.
- Safe and non-invasive: Unlike other cleaning methods that involve physical contact or chemicals, Fix My Speaker uses sound waves to gently and safely eject water and dust from your phone’s speakers.
- Effective and efficient: The app’s specialized sound frequencies are designed to target and remove various types of particles, ensuring a thorough clean in just a few minutes.
- Prevents long-term damage: By regularly using Fix My Speaker to clean your phone’s speakers, you can prevent the accumulation of water and dust that may lead to corrosion, short circuits, or permanent damage.
- Maintains sound quality: Clean speakers ensure that your phone’s audio remains clear, crisp, and loud, allowing you to enjoy your favorite music, videos, and calls without any distortion or muffling.
- Prolongs device lifespan: By keeping your phone’s speakers clean and free from damage, Fix My Speaker helps extend the overall lifespan of your device, saving you money on potential repairs or replacements.
How to Clean a Water Damaged Phone Speaker
Water damage can seriously impair your phone’s speaker functionality. Here’s an in-depth guide to cleaning and potentially salvaging a water-damaged phone speaker:
- Immediate Action: Power off your phone instantly to prevent short circuits. Remove the case, SIM card, and any external attachments. If possible, remove the battery (for phones with removable batteries).
- Initial Water Removal: Gently shake the phone to expel excess water. Use a soft, lint-free microfiber cloth to carefully dry the exterior. Pay special attention to ports, speaker grilles, and microphone openings.
- Targeted Speaker Cleaning: Use a vacuum cleaner on its lowest setting. Hold it close to (but not touching) the speaker grille for 30-60 seconds. This can help suction out water from within the speaker.
- Drying Process: Place the phone in a warm, dry area with good air circulation. Avoid direct heat sources like radiators or sunlight. Position the phone at an angle that allows water to drain from the speaker. Wait at least 48-72 hours before attempting to turn on the device.
- Using Fix My Speaker Tool: After the initial drying period, use our “Water Expeller” sound. Play this low-frequency (50-100Hz) sound for 30-60 seconds. This can help vibrate out any remaining moisture in the speaker components.
- Testing and Follow-up: After the drying period, power on your phone. Test the speaker with a variety of sounds (music, ringtones, voice recordings). If issues persist, repeat the Fix My Speaker “Water Expeller” process.
- Professional Help: If problems continue, consider professional repair services. They can open the device safely and address any internal water damage.
The Rice Method and Other DIY Approaches: Myths and Facts
The Rice Method:
• Myth: Submerging your phone in rice will absorb all the moisture.
• Fact: Rice can absorb some ambient moisture, but it’s not very effective for internal water.
• Risks: Rice particles can get into ports and cause additional problems.
• Better alternative: Use silica gel packets if available, or focus on air-drying.
Silica Gel Packets:
• Myth: Silica gel is a perfect solution for wet phones.
• Fact: While more effective than rice, it still works slowly and may not reach internal moisture.
• Usage: If you have them, place the phone in a sealed container with silica gel packets.
• Caution: This should be in addition to, not instead of, other drying methods.
Blow Dryer Method:
• Myth: A hair dryer can quickly dry out your phone.
• Fact: The heat can damage sensitive components and potentially push water further into the device.
• Risk: Excessive heat can warp plastic parts and damage the battery.
• Safe alternative: Use a fan for room-temperature air circulation instead.
Leaving it in Sunlight:
• Myth: Sunlight is a natural, effective way to dry your phone.
• Fact: Direct sunlight can overheat the device, potentially causing more damage than the initial water exposure.
• Danger: Excessive heat can damage the battery, screen, and other sensitive parts.
• Better option: Place the phone in a shaded, well-ventilated area instead.
Freezer Method:
• Myth: Freezing the phone will prevent water damage.
• Fact: This can cause condensation when thawed, potentially causing more water damage.
• Risk: Extreme cold can damage the phone’s battery and LCD screen.
• Avoid this method entirely.
User Reviews: Fix My Speaker’s Effectiveness in Ejecting Water and Dust
People Also Ask
How does Fix My Speaker remove water and dust from phone speakers?
Fix My Speaker uses specifically designed sound waves to create vibrations that eject water and dust particles from your phone’s speakers. The app offers two sound options, each targeting different levels of cleaning intensity.
Is Fix My Speaker safe to use on my phone?
Yes, Fix My Speaker is entirely safe for your phone. The app uses non-invasive sound waves to clean your phone’s speakers, preventing any potential damage that may occur from physical cleaning methods or exposure to liquids.
How often should I use Fix My Speaker to clean my phone’s speakers?
The frequency of using Fix My Speaker depends on your phone’s exposure to water and dust. We recommend using the app once a month for regular maintenance, or immediately after your phone has been exposed to liquids or dusty environments.
Can Fix My Speaker completely repair water-damaged phone speakers?
While Fix My Speaker is highly effective in removing water and dust from phone speakers, it may not be able to repair severe water damage. In cases of extreme water exposure, such as submersion in saltwater, it’s best to consult a professional phone repair service.
Is Fix My Speaker free to use, and do I need to download an app?
Fix My Speaker is a completely free web app that does not require any downloads. Simply visit the Fix My Speaker website on your phone’s browser, and you can start using the app immediately to clean your phone’s speakers.

Raj, an Electrical Engineering graduate from Mumbai Tech University, is the creator of “Fix My Speaker” – an innovative tool that uses sound to diagnose and repair speaker issues. With a decade of experience in audio systems, Raj combines his technical expertise and passion for quality sound to develop user-friendly solutions for common audio problems. When not working on audio projects, he enjoys exploring local music scenes and tinkering with vintage equipment.
It Worked! Thanks for the solution
I am Rohit Kumar
Best app!
7080894472 Ajit kumar
Thanks bhai
Nice👍 technology speakear problem solved💪😄👌
Me shahd ahmad alhsen
Shamima ahmed gorssi